Pictures

Barley Beef Stew

This is a repost from Blogblivion, posted here back in November. A few days ago, after an extended break, I made beef stew again, using my big stock pot and about 2 1/3 lbs of $1.59 “London broil” steak cut up small.

I started with a hunk of butter, melted in the bottom of the pot, with the majority of a large, sweet onion chopped and sauteed in it, starting to add seasoning, especially a mess of celery flakes. Then I added the meat and cooked it most of the way through, stirring in more seasoning. Ultimately the main thing was you could really taste the beef and peas, and a bit too much black pepper, but we ate it for four meals. The enthusiastic reception was a combo of it was especially good, the right weather, and completely unexpected. I didn’t have any real garlic, so just used some powder. I was limited in frozen veggies, so it got a lot of peas and some traditional frozen mixed veggies to add variety. It could be enough to have the potato, barley, carrot and onion, but adding at least the peas really adds something.

Okay, the rest of this is the original post:

Yesterday I made what we have dubbed barley beef stew, based on a recipe for beef & vegetable barley soup on the Goya barley package. I had a pound or so of top round steak in the freezer, left from a 2 piece, 2.44 lb package I bought recently for an astonishing $1.89/lb.

Their recipe calls for beef, barley, onion, garlic, spices, boullion, water, and a can of mixed vegetables.

We wanted something thicker, and would be using frozen or fresh vegetables, but I par-cooked the fresh ones based on the idea that precooked would go into the recipe as written. I could probably have just put the fresh veggies in right after adding the water.

So it went something like this…

Olive oil – tbsp or so
Beef, a pound or so, cut in small, vaguely cube-like pieces
Small onion or equivalent; I used 1/3 of a largish sweet onion
Garlic, 1 clove, minced; was small and I could have used two
Oregano, 2 tsp
Celery salt, probably about 1/4 tsp; not in original, subbed for not having celery or celery seed, either of which I’d have used instead if I’d had them
Beef boullion cubes, 2
Water, 4-5 cups; original was 4, I had to add a good cup more
Bay leaf, 1; I used crushed equivalent of 1+

, a little too much
Barley, 1/2 cup dry uncooked
Potatoes, 2 small to medium size, peeled and cubed
Carrots, 2 medium to large, peeled and sliced; I cut the largest slices in half
Lima beans, frozen, maybe a cup
Peas, frozen, maybe a cup
Other spices to taste, in pinches or more, including but not limited to black pepper, red pepper, cumin, savory, parsley, fennel seed.
(Corn, green beans, or mixed might work as well. We had no corn or it would have been in there.)

ObCTG: Remove lens cap.

Heat the oil in a saucepan and brown the beef. For me it was more of a medium pan, too deep to really brown and just cooked and bled water, which I boiled off as much of as I could.

Stir in onion and garlic and cook until onion tenderizes.

Stir in oregano, bay leaf, celery salt or seed, boullion cubes and water. Other spices can go now, later or both.

Bring to boil, then reduce heat and simmer. Original called for an hour, but I cut it short by at least 10 minutes. I put in part of the carrot and potato at start of simmer and the rest maybe half an hour in. I’d probably not par cook them next time and put them in at or near the start.

Add barley and frozen (or canned or precooked) vegetables.

Cook over medium to low heat another 30 minutes.

It was right before or during the last step I added black pepper, about 3 fennel seeds, and a dash of extra oregano.

Anyway, it was the tastiest beef stew or soup I have ever had. I started tasting the beef when it was first fully cooked and it was divine. It reminded me of my late grandfather’s beef stew when it was “on,” maybe a little more flavored. My grandmother is a great cook, but beef stew was one of his specialties. It actually got weaker later on, which, along with thinking it had too much bay leaf flavor, was what inspired me to touch up the flavorings. I also had to add water when I added the barley and frozen veggies. I should note that the barley could have gone in sooner, and actually finished absorbing water and cooking after the heat was off, as it was quite a while before we ate more than a sampling.

Deb said I’d outdone myself, and has claimed the lefover bowl of it for Mars herself. It made four solid bowls worth, and we estimated it at IIRC about 440 calories each, loaded with nutrients and fiber.

Pictures? Why yes, we have them.

This is after I’d added the veggies, barley and more water. In the first one it looks deceptively watery, but the second one shows just how thick it was in the pan.

The picture below is the leftovers, showing how thick it became after the barley finished. I thought it would be perfect to serve on and with injera (which even if I never try making an Ethiopian dish, I have a reason to try making now). We had wheat bread and butter, which is more traditional. Sadie was being bird-like, but Valerie couldn’t get enough of it.

Pita Pocket Bread and Hummus Experiments

So I experimented making two related foods: pita bread and hummus. The recipes linked are what I followed most closely, though I tend to do a survey of various recipes for a given item and get a feel for what they involve and have in common, and what might make good variants. It is worth noting that Triticale has an interesting hummus recipe that goes into the many possible variations.

Pictures are at the end of the post.

Pita is basically just one of the many forms of flatbread that seem common in wide swaths of the world. You start to see what the differences and commonalities are, but whether it’s made with lard and salt water, milk and yeast, water and yeast, in the oven or on a pan, coated with egg yolk, clarified butter, oil, or nothing, it all starts with some form of flour and results in a more or less flat result that can be used to wrap or pick up food. Pita pocket bread is different in that it’s commonly encouraged to puff up so there is a pocket when you’re done. Perhaps it will work that way for me next time.

The result tasted awesome. We learned it does not keep long out in a zipper bag in the kitchen in summer. Next time

, we refrigerate, as you do with flour tortillas.

We had them with the hummus, but more so with butter, peanut butter, or honey. I even tried a little straight tahini on a pita chip. Tahini is essentially natural “peanut butter” made out of sesame seeds; sesame butter, if you will. It has a nutty flavor, and will make your mouth stick together worse than any peanut butter I ever tried. I’m convinced it mainly needs to be used in other foods, or with something else; perhaps tahini plus honey on a cracker or bread, for instance.

The dough turned out way too sticky. To work with the stuff at all, the rolled out dough was thick with flour on the outside. They were baked that way and it looked funny. This recipe called oil in the bowl in which the dough rises, such that the whole thing has a coating. Other recipes called for brushing a little oil on the rolled out pita before it baked. Afghanistan’s variant of flat bread is essentially the same as pita bread, but you score it and brush it with egg yolk before baking.

So, next time the dough gets more flour or less water in it to keep it from being so sticky, and I’d be inclined to brush them with olive oil before baking.

Also, the oven needs to have more time than I gave it to warm up, and the higher the temperature, the better. The recipe says 500. I ended up at 550, and it’s apparently traditional to do them in ovens that can be more like 700. The first batch was cooked, but just.

I did get some puffing. Any degree to which I was able or bothered to turn any of the result into pockets required a knife to insist that they open.

They were just plain tasty. The kids loved them. They also made pretty good chips. I cut one into little triangles and used top brown in the toaster oven to crisp them. That worked perfectly.

They were kind of a pain in some ways, but overall pretty easy.

Hummus is basically cooked, ground up chick peas, also called garbanzo beans, with some other stuff, most notably tahini. Most of the time you are using lemon juice, and I wish I’d had fresh. They also call for garlic. All the recipes I’ve seen call for canned beans, and I can see where that would be convenient. I just happened to have dry beans.

I used have the 16 oz package, quick soaking them as I would pinto beans. That is, put them in a pan of water, bring it to a boil, then immediately turn it off, let them soak and hour or more, then drain, add fresh water, and cook.

I used two cloves of chopped garlic. That was too much, without having used more lemon juice or something else to balance it.

When the beans are ready, you’re basically running them through a blender or food processor to turn them and the other ingredients into dip-like paste. I used the cooking water from the beans as needed when it was too thick.

I departed from the recipe by adding a little red pepper and cumin from the spice cabinet. I also goofed and forgot to add the olive oil, which I should have remembered after looking at a variety of hummus recipes. It does work as an addition when serving, but the hummus would have been better with it added. Finally, I see it says to grind the chick peas, cool them, then add the rest. Oops. I was only half paying attention to the recipe.

Frankly, I am more interested in making pita bread again than in making hummus again, but Deb enjoyed it enough that it might be worth an experiment… with real lemon and more of it this time, and some other adjustments. The pita bread is just a nice variant to have for sandwich-like usage, it doesn’t need the hummus as an excuse. Plus the kids loved the bread and hated the hummus, and there’s pretty much nothing they don’t eat.

Okay, here are the pictures. First, the beans cooking:

Hummus in the blender. I started with the food processor but it was both too small to hold it all at once, and surprisingly ineffective at complete and consistent choppage:

Hummus as served in a bowl, with a little olive oil and red pepper added:

Now the pitas, starting with the dough, still there despite having risen:

The dough after splitting it up. I made 13 of these, but might have been better to make no more than 10 and roll them a bit thicker:

Uncooked pita dough, rolled and ready for the oven:

Pitas on the cookie sheet:

Stack of cooked pitas:

Pita chips:

Chili and Refried Beans

Sharon has what sounds like a tasty and easy chili recipe, complete with actual measurements. I notice it doesn’t call for chili powder, but you’ll note that it includes all the components of chili powder: cumin, cayenne pepper, garlic and oregano. I also love cornbread with chili. Her post and the cold weather inspired me to make some last night, even if it is nontraditional with pasta and red sauce. The kids just love it, until they get full and merely turn it into tiny crumbs.

I made my version of chili the other day and meant to write about it, so I thought it was funny we were doing unplanned chili synchronization between households.

First a bit about history.

Once upon a time, I used to make what I call faux chili based on cheap cans of Campbell’s Pork & Beans. Which isn’t so odd, in that they are pinto beans in a tomato-based sauce, and chili seems to be made normally with pinto and/or kidney beans. I considered it both tasty and part of eating cheap, which will be the topic of another post Real Soon Now. Let’s just say I didn’t know from eating cheap, and didn’t know at the time that cans of those beans on sale 3 or 4 to a dollar was not that cheap.

Back then, I’d cook up some pepper and onion if I had it, ground beef, toss in beans, season it mainly with chili powder, add some ketchup and a squirt of yellow mustard, add sugar or brown sugar as needed, and serve it to myself for 2 or 3 big meals. It was quite good. I believe I also used tomato paste at least sometimes.

Lately I’ve discovered the joys of dry beans, taking it back closer to scratch and being really cheap. When I knew I was spending my last cash for probably a couple weeks on stocking up groceries last week (except a little reserved for milk and a few other run-outs), knowing the rate we’d been using them and comparing the unit price, I bought a 64 oz. bag of pinto beans instead of the customary one or two 16 oz bags.

Dry beans require planning. You can’t get to 5:00 or 6:00 and say “hey, let’s have beans!” We put them in a pot of water, bring it to a boil, then turn them off and let the gassiness soak out of the beans for an hour or more before draining them and adding fresh water for the actual cooking.

At that point you have beans on their way to ready for whatever you mean to make. Heck, you could serve just beans with some butter, salt and pepper on them, the way my father loves shell beans. When I set out to make chili, I wasn’t sure if it would be truly ready on time, and even if so, we would also want refried beans around in the next couple days for burritos.

I cooked 16 oz. of beans, 2 cups dry, and when they were cooked enough, I took two cups or so wet out of the pan, and some of the water as needed, for refried beans.

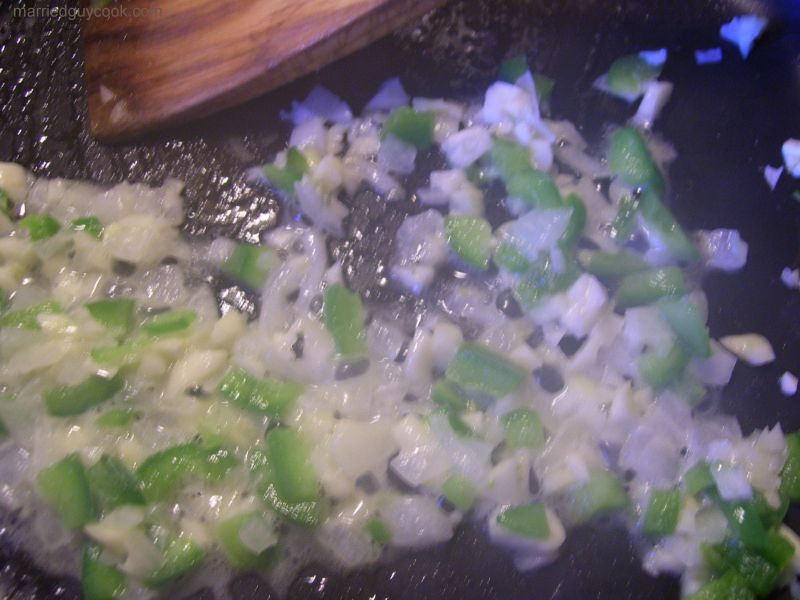
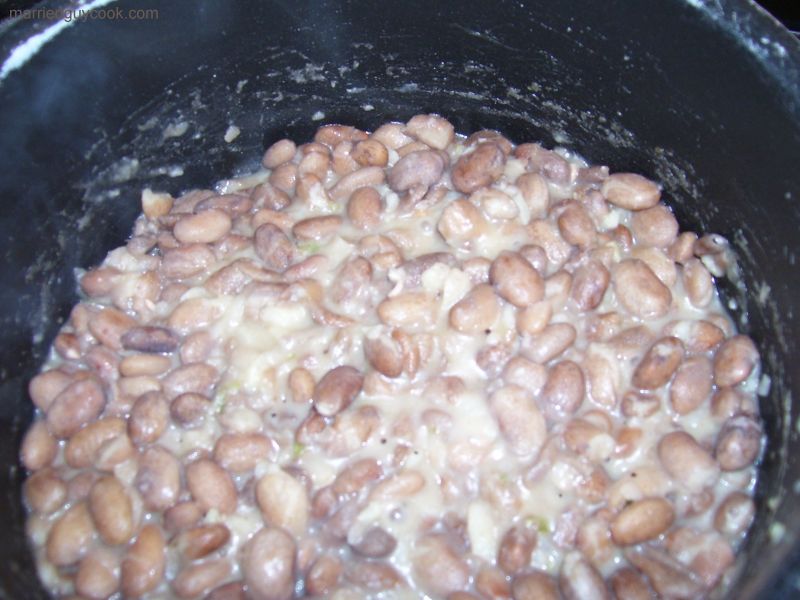
For the refried beans, I actually used a medium sauce pan. I threw in a generous chunk of butter (probably 3 tablespoons), cooked a handful of chopped fresh garlic, onion and green pepper, all of which are optional or could be replaced with dry seasonings. All you really need is beans, if you want nothing more than their yummy flavor. What I missed is an effective masher, and I’d not cooked the beans to the point of mush before splitting them for refried and chili.

When the flavoring veggies were cooked right (translucent onions, for instance), I threw in the beans, did a lot of smooshing and stirring as best I could, adding liquid as needed to keep them from being too stiff and dry to work with or to cook without burning. I also added I forget what else, but mainly cumin, not a lot, and possibly some red pepper, cilantro or oregano. The beans came out tasting mostly like beans, to give some idea; more enhanced than flavored. They were absolutely fantastic and got raves. We did indeed have burritos that night and let the chili simmer longer. It was interesting making two suppers at once, but a huge treat not cooking the second day.

The stiff texture of the beans made me picture making sandwiches based on them. I figured mix a small amount of finely shredded meat in with them, maybe use meat broth to imbue them with meat flavor, and there you’d have a serious meat stretcher or substitute. Which means I just reinvented the idea of falafel, sort of.

Back to the chili…

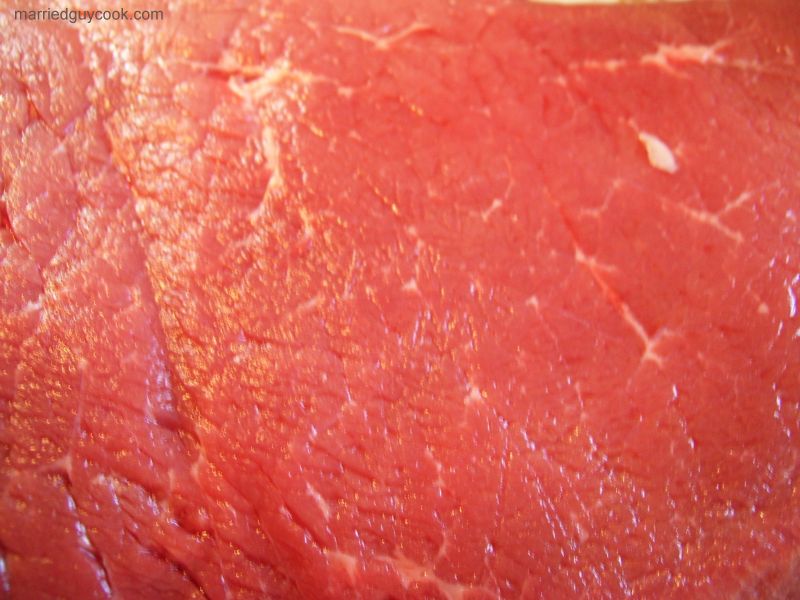
My new favorite thing to do is make chili not with expensive ground beef, but with the cheapest on sale beef, like top round for London broil at $1.69 or whatever. By comparison, I recently bought 90% ground beef and by buying it in a 6.67 lb package at BJ’s got the remarkably low price of $2.29. Chili would be fine with the fattier ground beef, fortunately, but we normally buy and freeze one kind and use as needed, rather than running to the store specifically for a variant for a meal we decided to make.

I cut the beef into small chunks and add it to a frying pan with, optionally, stuff like chopped garlic, pepper and onion. I add spices to it, or to the butter before it goes in, including but not always celery flakes, cilantro, red pepper, black pepper, paprika, allspice, ginger, cumin, oregano, and chili powder. Without the real versions added, that would include garlic and onion. I basically stir regularly and cook until done, letting some of the juice cook off but keeping some.

If I ever remember, I will probably throw a small amount of vinegar in with the meat not long after it starts cooking.

In the meantime, I’ve thrown some chili powder and maybe other spices into the beans. Tomato-based stuff can go in before or after the meat. I normally use tomato paste, as small can, and ketchup, using more as needed later to adjust the flavor. Diced tomato, tomato soup, or whatever would work, depending what you have and what you like. The beauty of chili is it’s highly variable and a matter of taste.

A little vinegar can be good, giving it added tang, especially if you are not using ketchup, or have too little ketchup on hand. I keep forgetting until the chili is well underway, and then this time I added too much. The small dribble turned into a good sized glug. It didn’t ruin the chili, but it added more tang than I planned and needed to cook and soak in far longer to balance the flavor.

After everything is mixed together, it’s just cook, stir, taste, adjust as needed. I normally throw in a not insignificant amount of brown and/or white sugar. I normally add more chili powder at least once, and perhaps other spices depending how strong the flavor seems. If you get it too spicy, it remains too spicy, but at least sugar tends to ease the bite.

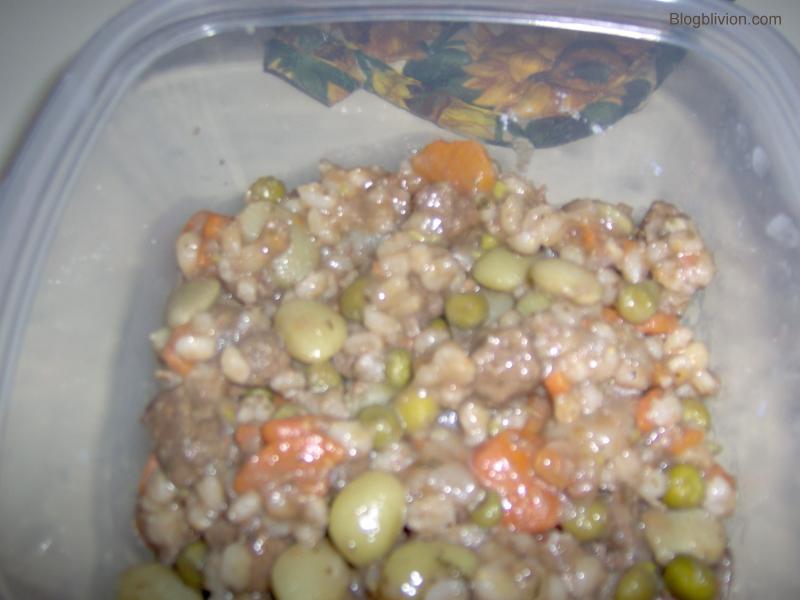
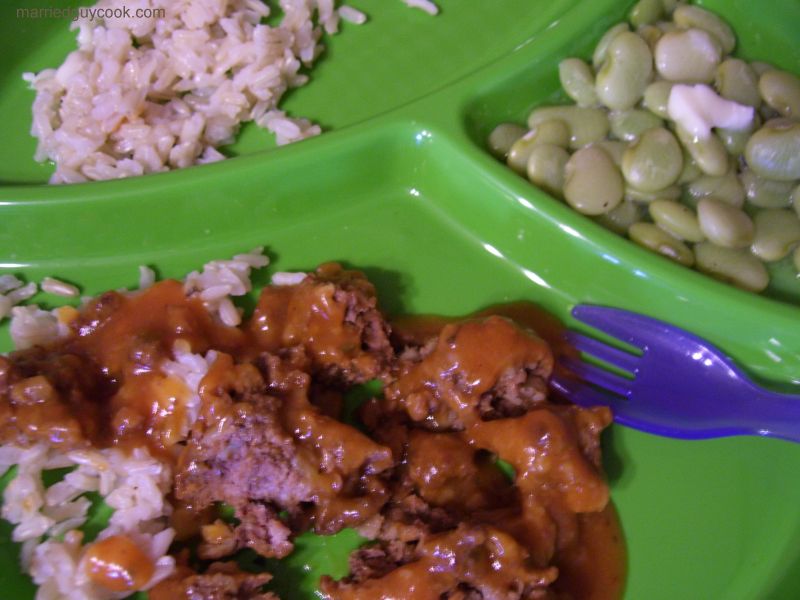
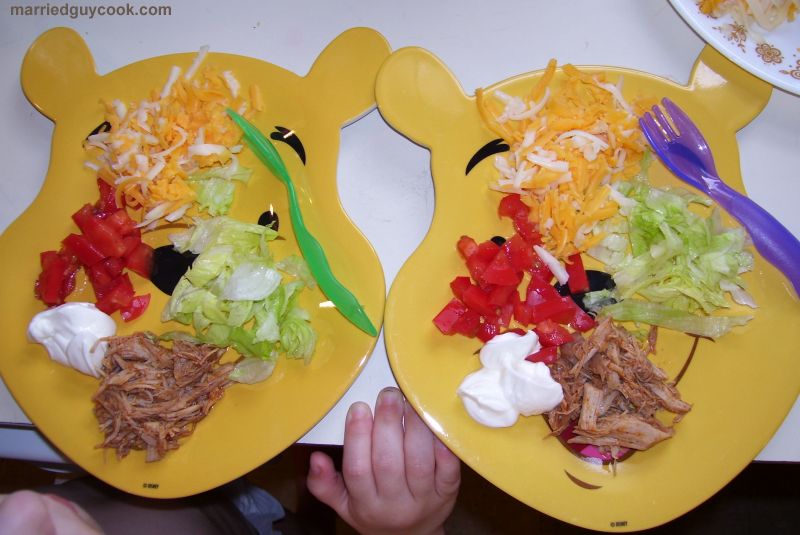
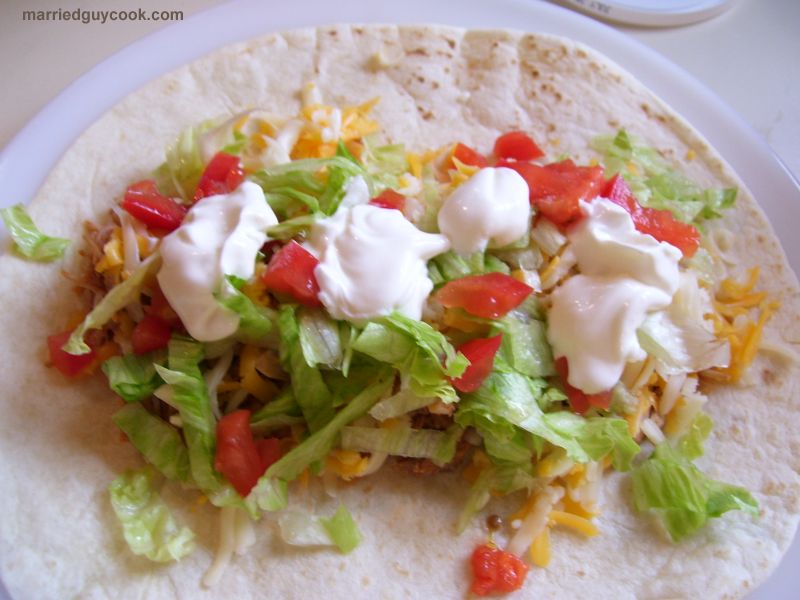
What amounts to no more than 3/4 of a 16 oz. bag of beans and no more than 2 lbs of beef makes us two good meals. It can be served with shredded cheese, a dab of sour cream, tortilla chips, bread and butter, or corn bread as mentioned earlier. It can be made thinner or thicker. It can be made in greater or lesser proportions of beef to beans. It can be made hotter or milder. Whatever I start with, mine tends to come out in a particular taste range, frankly almost identical to the taste I used to achieve starting with Campbell’s beans and owning a smaller variety of spices. I haven’t tried it on hot dogs yet…

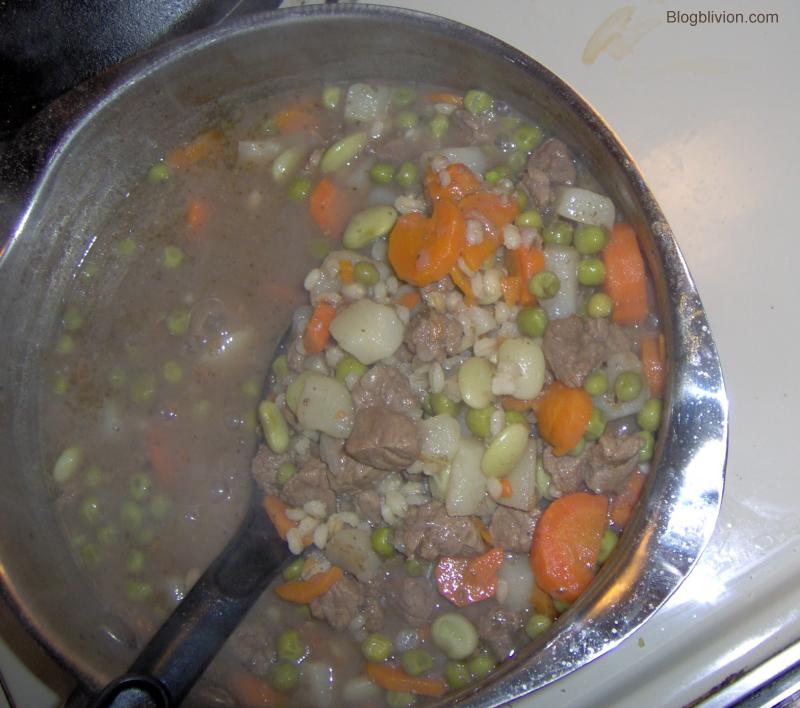
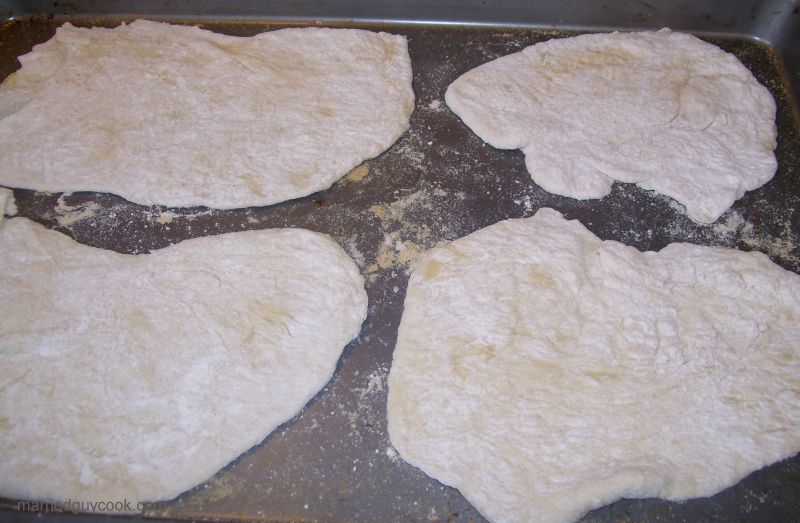
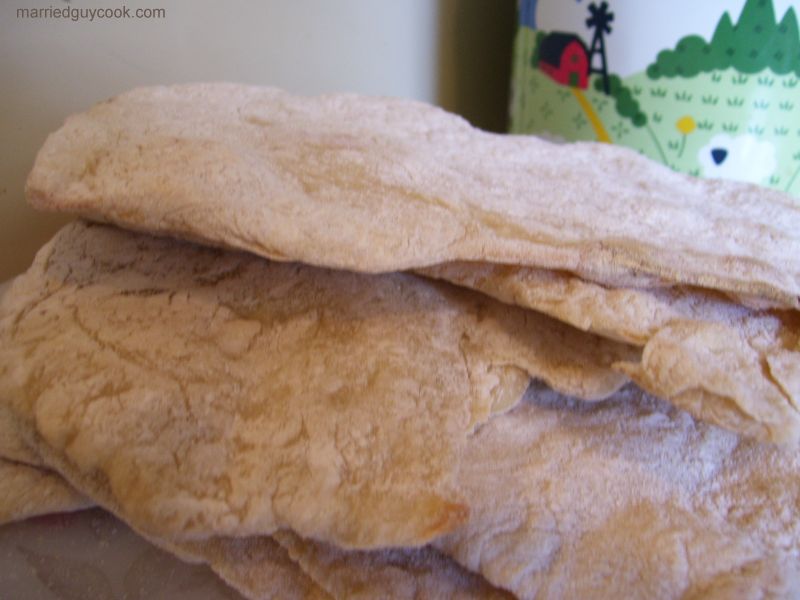
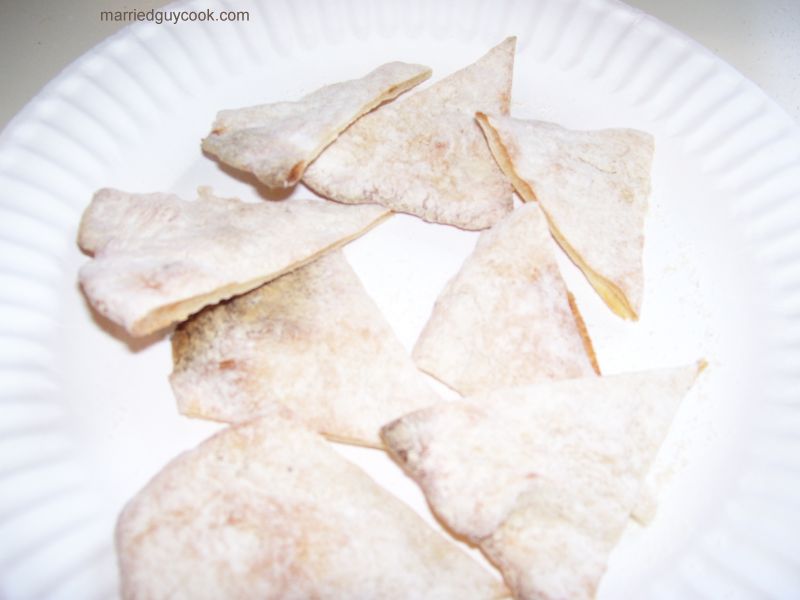
I actually have pictures off the camera in time to use them in the actual post. Some orphan pictures should follow today in their own post. I had some fun with raw ingredient or cooking stage pictures this time around, just plain trying to get interesting pictures.

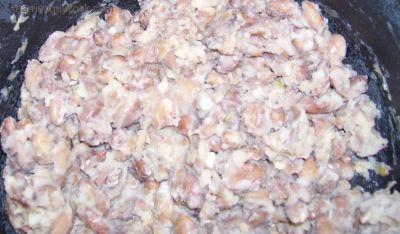
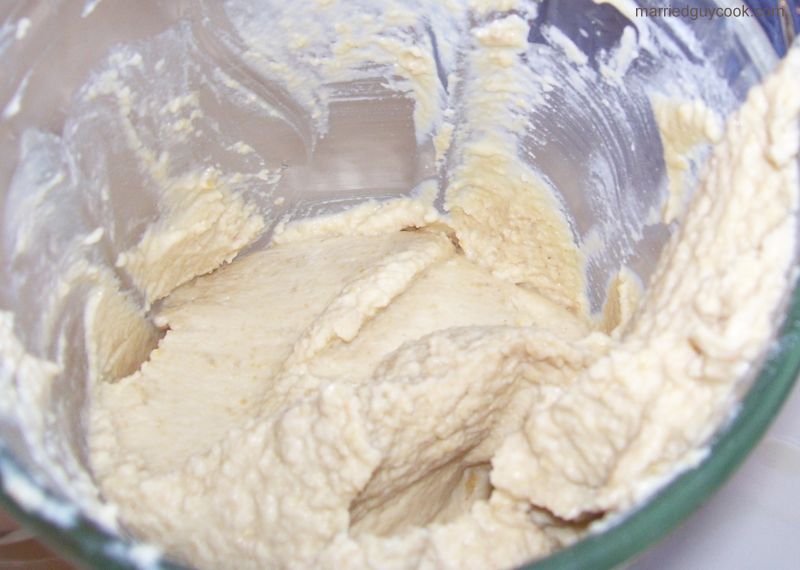
Partially cooked and then mostly done refried beans:

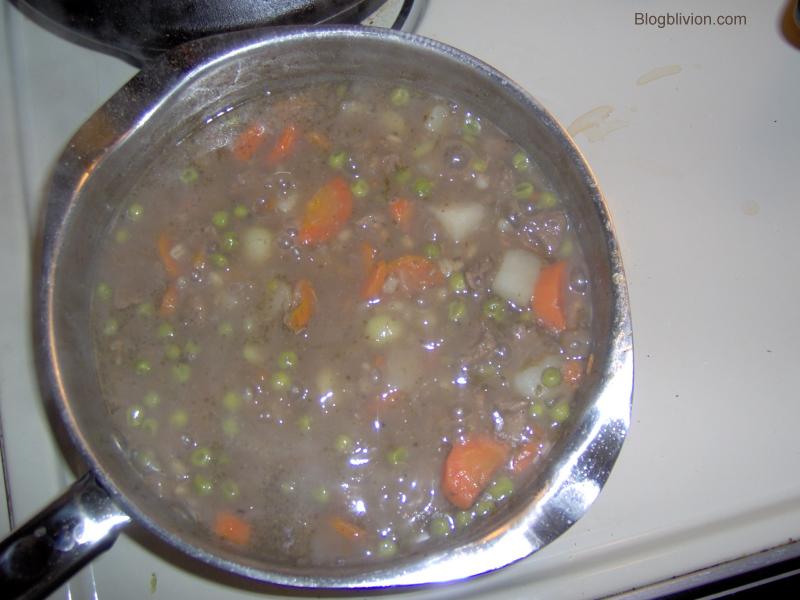
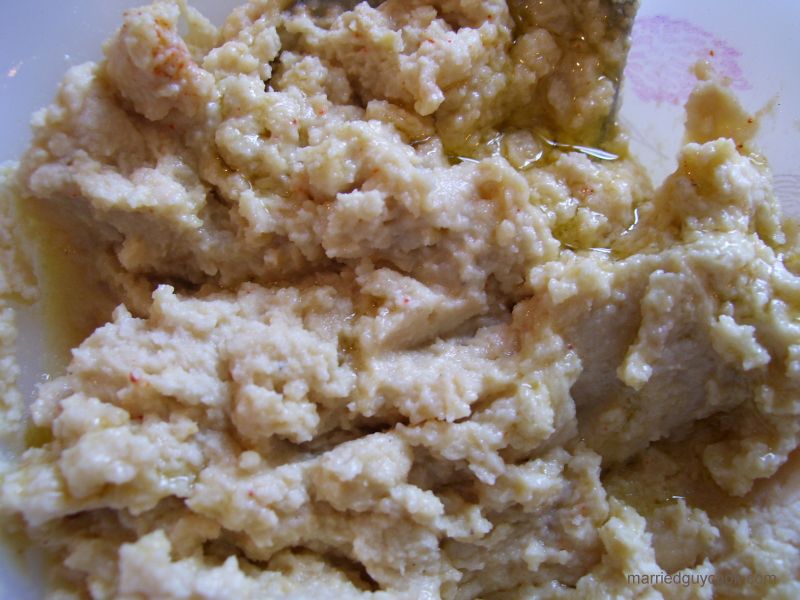
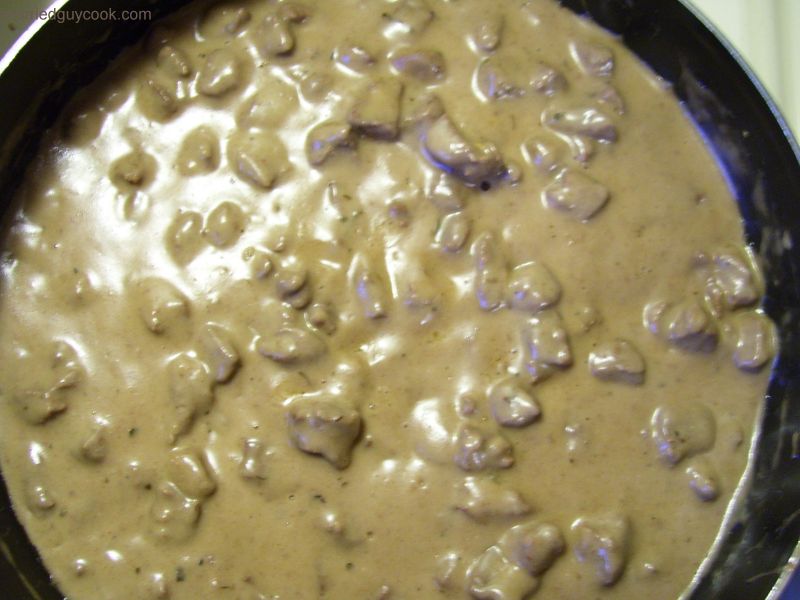
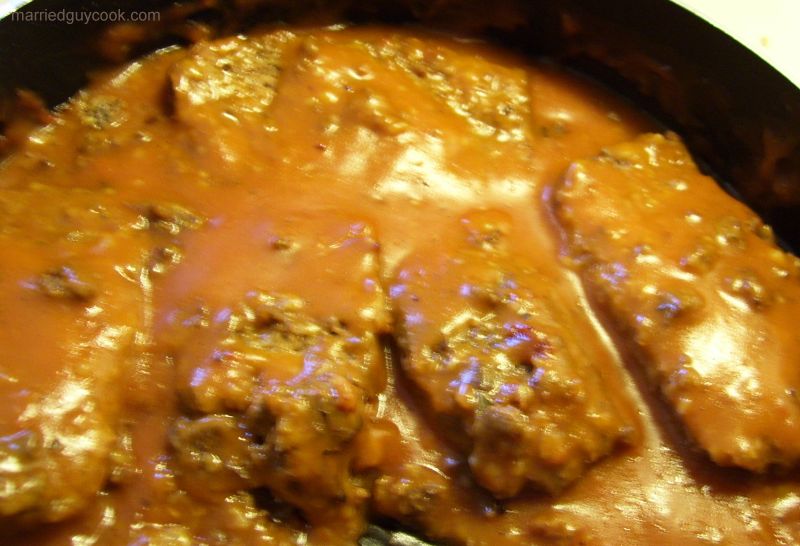
The chili, done or near the end:

Pictorial

I have to do some work that prevents me from posting further until later or tomorrow, unless I find I really need a break and a post fits that neatly. Meanwhile, I leave you with a pictorial (click each picture for larger version in new window if desired)…

The three above relate to my burrito post. First, ingredients for chicken burritos made without refried beans, as laid out for consumption by the kids. Sadie eats it with a quarter flour tortilla on the side, and usually eats a second quarter too. She wraps meat or dips it in sour cream. Next, ingredients for the same thing, but with refried beans, amd corn rather than the usual lettuce and, for me and the kids if we have it, tomato. Finally, chicken cooked to go in burritos, as it appears in the frying pan.

The above two are the chicken in gravy concoction I invented, as mentioned in this teaser post. First, in the pan, then in context as served over rice to one of the kids, with peas and our first of the season corn on the cob. Unlike when we serve us burritos and them burrito ingredients loose on a plate, we all ate it the same way. It would have been great on egg noodles or mashed potato, let alone as a pot pie filling with carrots and whatever.

The above two also relate to the teaser post and should get their own post later. First, it’s the ingredients for shredded pork tacos as served on plates for the kids. Then it’s a shredded pork (soft) taco before being folded to eat. Pretty, huh? These were a big success, and great for using the crockpot for convenience and not having to think about spices because you’re using a canned sauce. I’d like to try making my own variant sometime, seeing what I can do without the canned sauce. But I digress, and will get to this topic again later.