Repost

Revisiting Mama Jedi’s Flour Tortillas

Once upon a time, Deb posted her mother’s flour tortilla recipe at our former joint/family/anything blog, Accidental Verbosity, before moving to Blogblivion. We eat these fairly regularly, and once etsimated the cost for perhaps 16 of them at under 40 cents, versus, say, $1.69 for a pack of 8 commercial ones. You pay to save time and effort and get uniformity, but even Manny’s brand isn’t as good as homemade. It probably costs more now, given the recent increases in grocery costs and particularly, we just noticed on having to replace an empty, Crisco. That resulted in buying store brand soy/cottonseed shortening comparable to the current Crisco formulation. Traditionally one would use lard, which Deb almost got me as it was available and inexpensive. Definitely have to try that sometime.

This is a repost and, because it wasn’t written by me, guest recipe, inspired because I recently started making these myself, and found that the recipe was harder to find searching than it ought have been. I realized I’d started a food and cooking blog but never posted this here. Duh.

This was something Deb knew how to do inside out and I deferred to her, as one of her specialties. I’ll comment further at the end, but here is her original text:

Mama Jedi’s Flour Tortillas

We’ve been experimenting with different things to do with flour tortillas ever since we finally got around to trying my mother’s recipe for them. She used to make these often when I was a kid, since they’re better and cheaper than store-bought (and, I believe, because at the time it was tough to get even a passable grocery-store tortilla in rural Minnesota, a situation that has since changed). She taught some of the other women in the neighborhood how to make them, too, and they’ve been a hit with all who have tried them.

Mama Jedi’s Flour Tortillas

4 cups flour
1/2 cup shortening, in small cubes
1 & 1/4 cups warm water
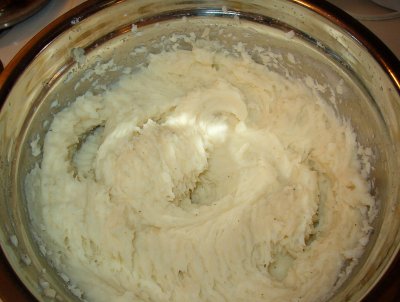
1 & 1/2 teaspoons salt

Dissolve salt in water and set aside. Rub shortening into flour with fingertips. (I’ve got the warehouse-club-sized can of shortening, so I meaure it into a cup then divide it as I add it to the flour…instead of a single lump, little spoonfuls. Works just as well…the point is to have it in small pieces so it’s easier to rub into the flour.) Gradually add salt water to flour mixture. (The trick here is getting the flour/water ratio right so the dough is smooth rather than sticky or flour-y. I always seem to need a tablespoon more water or flour to make it just right, depending on how perfectly I’ve measured and the weather that day.) Knead well. Set aside covered for a minimum of three hours (I wrap it in plastic wrap

, to keep the dough from getting a “skin,” then toss it back in the bowl and cover with a towel.). Knead again. Divide into 1 & 1/2 inch portions and roll out on floured board. (I shape the dough into a cylinder, then cut off the appropriate portion for the size I want for each tortilla. Usually takes me a test tortilla or two to get it right. The best part of that is that the mistakes are so tasty…yum. I also roll them out right on my countertop…a board is certainly not required, unless you have tile. *grin* The dough should be good and stretchy and a bit of a pain to roll out, and tends to shrink slightly when transferred to the pan, so roll ‘em thin.) Cook each on a hot griddle/frying pan until it bubbles and browns slightly. Makes anywhere from 12 to 18 tortillas, depending on size, thickness, and how many get eaten along the way.

As for what we’ve done with them…we’ve made burritos and quesadillas and even chicken and veggie wraps in the last couple of weeks, and I have no doubt some of the turkey will find it’s way into them in one form or another. Very versatile and very, very yummy.

The first time I made these, I became the official tortilla maker, they came out so well. The directions above say knead again after the dough sits at least three hours. Turns out that Deb didn’t actually do that when she made them. I did it minimally at best. It doesn’t seem to hurt them and anecdotally may be better, though certainly if the dough needs a little extra to get the texture feeling better while making it into cylinders.

I use one of those Pyrex cups that has lines up to a cup but room to add an extra quarter cup by eye. I microwave cold water a minute or 90 seconds, stir in the half tablespoon of salt to dissolve, and set it aside. I’ve been using about a cup in practice.

I make sure the flour is worked into the shortening extremely thoroughly. It’s somewhat like making pie crust, but without the objective of flaky.

I flip them over and over while rolling, to hel combat the curling and get them thin enough.

Basically it’s an easy easy thing to make. The big consideration is the sitting time for the dough. It’s fast compared to making bread. It’s even relatively fast to roll out, and I roll a couple then start cooking as I roll more.

They are so useful and so cheap. We’ve had the challenge of a baby with food sensitivities that seem to be based around salicyslates, and these were a perfect introduction to wheat-based foods, which as expected don’t bother him. Being simple and homemade, I knew exactly what was in them. Not like, for instance, whoile wheat pasta that contains corn meal, which he can’t have. But I digress.

Enjoy!

Barley Beef Stew

This is a repost from Blogblivion, posted here back in November. A few days ago, after an extended break, I made beef stew again, using my big stock pot and about 2 1/3 lbs of $1.59 “London broil” steak cut up small.

I started with a hunk of butter, melted in the bottom of the pot, with the majority of a large, sweet onion chopped and sauteed in it, starting to add seasoning, especially a mess of celery flakes. Then I added the meat and cooked it most of the way through, stirring in more seasoning. Ultimately the main thing was you could really taste the beef and peas, and a bit too much black pepper, but we ate it for four meals. The enthusiastic reception was a combo of it was especially good, the right weather, and completely unexpected. I didn’t have any real garlic, so just used some powder. I was limited in frozen veggies, so it got a lot of peas and some traditional frozen mixed veggies to add variety. It could be enough to have the potato, barley, carrot and onion, but adding at least the peas really adds something.

Okay, the rest of this is the original post:

Yesterday I made what we have dubbed barley beef stew, based on a recipe for beef & vegetable barley soup on the Goya barley package. I had a pound or so of top round steak in the freezer, left from a 2 piece, 2.44 lb package I bought recently for an astonishing $1.89/lb.

Their recipe calls for beef, barley, onion, garlic, spices, boullion, water, and a can of mixed vegetables.

We wanted something thicker, and would be using frozen or fresh vegetables, but I par-cooked the fresh ones based on the idea that precooked would go into the recipe as written. I could probably have just put the fresh veggies in right after adding the water.

So it went something like this…

Olive oil – tbsp or so
Beef, a pound or so, cut in small, vaguely cube-like pieces
Small onion or equivalent; I used 1/3 of a largish sweet onion
Garlic, 1 clove, minced; was small and I could have used two
Oregano, 2 tsp
Celery salt, probably about 1/4 tsp; not in original, subbed for not having celery or celery seed, either of which I’d have used instead if I’d had them
Beef boullion cubes, 2
Water, 4-5 cups; original was 4, I had to add a good cup more
Bay leaf, 1; I used crushed equivalent of 1+

, a little too much
Barley, 1/2 cup dry uncooked
Potatoes, 2 small to medium size, peeled and cubed
Carrots, 2 medium to large, peeled and sliced; I cut the largest slices in half
Lima beans, frozen, maybe a cup
Peas, frozen, maybe a cup
Other spices to taste, in pinches or more, including but not limited to black pepper, red pepper, cumin, savory, parsley, fennel seed.
(Corn, green beans, or mixed might work as well. We had no corn or it would have been in there.)

ObCTG: Remove lens cap.

Heat the oil in a saucepan and brown the beef. For me it was more of a medium pan, too deep to really brown and just cooked and bled water, which I boiled off as much of as I could.

Stir in onion and garlic and cook until onion tenderizes.

Stir in oregano, bay leaf, celery salt or seed, boullion cubes and water. Other spices can go now, later or both.

Bring to boil, then reduce heat and simmer. Original called for an hour, but I cut it short by at least 10 minutes. I put in part of the carrot and potato at start of simmer and the rest maybe half an hour in. I’d probably not par cook them next time and put them in at or near the start.

Add barley and frozen (or canned or precooked) vegetables.

Cook over medium to low heat another 30 minutes.

It was right before or during the last step I added black pepper, about 3 fennel seeds, and a dash of extra oregano.

Anyway, it was the tastiest beef stew or soup I have ever had. I started tasting the beef when it was first fully cooked and it was divine. It reminded me of my late grandfather’s beef stew when it was “on,” maybe a little more flavored. My grandmother is a great cook, but beef stew was one of his specialties. It actually got weaker later on, which, along with thinking it had too much bay leaf flavor, was what inspired me to touch up the flavorings. I also had to add water when I added the barley and frozen veggies. I should note that the barley could have gone in sooner, and actually finished absorbing water and cooking after the heat was off, as it was quite a while before we ate more than a sampling.

Deb said I’d outdone myself, and has claimed the lefover bowl of it for Mars herself. It made four solid bowls worth, and we estimated it at IIRC about 440 calories each, loaded with nutrients and fiber.

Pictures? Why yes, we have them.

This is after I’d added the veggies, barley and more water. In the first one it looks deceptively watery, but the second one shows just how thick it was in the pan.

The picture below is the leftovers, showing how thick it became after the barley finished. I thought it would be perfect to serve on and with injera (which even if I never try making an Ethiopian dish, I have a reason to try making now). We had wheat bread and butter, which is more traditional. Sadie was being bird-like, but Valerie couldn’t get enough of it.

Laurie’s Chicken: Making It Measured

This is a repost of Laurie’s Chicken: Making It Measured from retired blog Accidental Verbosity. I’d have eventually reposted it anyway, but when I went searching for it today I found that Google had changed something about how AV is indexed or ranked that made traffic there plummet a couple weeks ago from just about 300 a day to under 100. Whatever that change was, it made this post not findable at all by title or most of the logical sets of keywords. I should probably start reposting systematically, but this is one of my favorites…

My stepsister used to make a hot red sauce baked on top of chicken breasts, usually as a treat for her less kitchen comfy cousin, and once for me when we were both at my father’s house in Vermont. It was so good, I always remembered it fondly and wanted the recipe.

My stepmother recently asked her about it, and here is the “recipe” as I received it:

1/3 cup ketchup, 1 TBLS W’shire Sauce, black and cayenne pepper to taste, dry mustard, Brown sugar (she said she sometimes used twin B. sugar) and a little apple cider vinegar. Says these are all the ingredients which as you can see its by taste. Cook until slightly reduced. I would think you could dble this as it does [not] make very much.

So I decided to attempt to measure and create a more detailed recipe

, based on guesses and adjustments to quantities the first time I made it. Here is what I wrote up as a result, followed by pictures during and after. It is all quite adjustable, but if you like hot and don’t like lack of measurements to guide you, this works:

Laurie’s Chicken Recipe

This would work for 3 breasts, or heavy on 2 breasts. This is extremely hot as measured here, and could be done lighter on both kinds of pepper to soften the impact. Everything is somewhat flexible, beyond that, to taste.

1/2 cup ketchup
1.5 tablespoons Worcestershire sauce
1/4 teaspoon black pepper
1/2 teaspoon red cayenne pepper
1/4 teaspoon dry mustard
3 tablespoons brown sugar
1 tablespoon apple cider vinegar
2 tablespoons or so water, optional
boneless chicken breasts (2 or 3, adjust recipe to make more)
2 – 3 tablespoons butter, optional

Combine the spices, ketchup, worcestershire, brown sugar, and vinegar. I ended up using water to help flush as much as possible out of the measuring cup I mixed it all in, when transferring to a small saucepan. It gets cooked down either way. I was tasting as I went along, adding brown sugar after it was in the pan. Stir regularly while cooking over low heat.

Preheat oven. I would estimate 400 degrees throughout to be appropriate, though I started at 450. I put butter in an appropriately sized Pyrex pan and let it melt in the bottom before taking the pan back out. This was on the theory I needed something greasing the pan, and everything is better with butter. It would probably work fine with spray or even nothing.

Place the chicken in the baking pan. Cover top of each piece more or less evenly with sauce. Bake until done, perhaps 25 – 30 minutes at 400.

Here’s the sauce on the stove while cooking down:

Here’s the chicken after I put the sauce on, before baking:

Here’s a finished chicken breast:

I don’t know how, but Deb makes arguably the best mashed potatoes I have ever had. Normally I’m more of a baked guy. Some might even say I’m half-baked. Anyway, neither here nor there with respect to the recipe above, this is what Deb made to go perfectly with the hot chicken:

It was amazingly good; a bit on the hot side for Deb, perfect to bordering on excessive for me.